Paper patterns for the new series are done (well, except for a few tweaks here and there) and now it’s time for the fun part: color and fabric!
I had a little trouble getting started. Which colors? Which fabrics? What surface design techniques? And how can I apply what I learned on my mini-retreat and book?
I started by making some silk scarves as gifts. Much less threatening and very useful this time of year. I sewed some chiffon scarves into tubes and then compressed them on to wine bottles before applying dye. Boy were they underwhelming. They just didn’t turn out at all. Luckily, I had also made some silk charmeuse scarves which I folded and clamped using large metal washers. They turned out really cool (see above).
That got me warmed up and yesterday I set up some breakdown screens using cheesecloth, string, fabric, and a table runner. They weren’t dry yet today (I didn’t really expect them to be–it is December). So I added fixative to the rest of the thickened dye I mixed yesterday and did some printing.
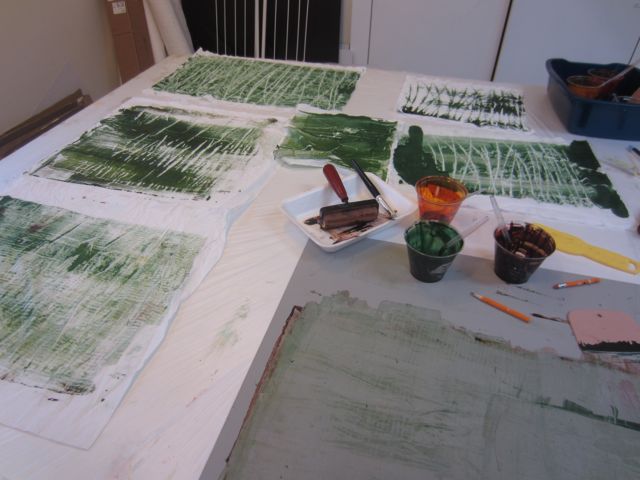
One of the techniques I used in my retreat was “draw throughs”. It’s a printing technique where you ink up a plate, put paper onto it and then draw on the back of the paper to transfer a design. On my retreat I used it to draw through onto the paper and then also printed the ink left on the plexiglass to get both a positive and negative of the image.
I didn’t actually think it would work with thickened dye. The alginate thickener is so gloppy and slippery and fabric is so absorbent that I didn’t anticipate it would be effective. But I couldn’t know unless I tried it.
I began by using a brayer to spread the thickened dye on a sheet of plexiglass. It didn’t work at all. The brayer just slipped around on top of the dye. I so used a spreader (from the hardware store–I think it’s used to spread grout). It was pretty streaky but since I like an organic look and I’m working with bark imagery, I didn’t mind at all. I laid a piece of fabric on top of the plexi and used a pencil eraser to “draw” on the back of the fabric.
When I pulled off the fabric it looked pretty cool. Then I took a print from what was left on the plexiglass. It also looked pretty cool. I played with that for a while and also used some cheesecloth to make designs.
I was having a blast and I worked back and forth for a while until I realized that, although it was really fun and I liked the effects, I wasn’t actually producing any fabric that was big enough to be usable for my pieces.
Now what? I don’t have a bigger piece of plexiglass. I looked around the studio. Lid from big plastic bin? No, there’s writing imprinted in it. A silk screen? What a mess that would be. Just the table? Mess also. How about the cutting mats I use when I cut with the rotary cutters? Not the front, dye might get into the cracks and then transfer when I was cutting fabric, but what about using the back?
I’m happy to say it worked. The mat adds a texture but the dye actually spreads out pretty nicely. And it was easy to clean when I was done because it’s flexible.
I just got everything out of the washer and threw it in the dryer. What shall I try tomorrow?


